A crystal-clear windscreen is fundamental to safe driving, yet many motorists underestimate the complexity of effectively removing grease and stubborn contaminants from their vehicle’s glass surfaces. Professional-grade windscreen cleaning requires more than a quick spray and wipe – it demands understanding the various types of contamination, selecting appropriate tools, and employing systematic methodologies that ensure both effectiveness and safety. Modern windscreens face constant exposure to automotive fluids, road pollution, organic matter, and interior contaminants that create challenging cleaning scenarios requiring specialised approaches.
The consequences of inadequate windscreen maintenance extend far beyond aesthetic concerns. Greasy windscreen surfaces significantly reduce visibility, particularly during adverse weather conditions or when encountering glare from oncoming headlights. Furthermore, accumulated contaminants can cause permanent damage to glass surfaces, leading to costly replacement requirements and potential MOT failures.
Understanding windscreen grease contamination types and sources
Effective windscreen cleaning begins with identifying the specific types of contamination affecting your vehicle’s glass surfaces. Different contaminant sources require tailored removal approaches, and misidentifying the contamination type often leads to ineffective cleaning attempts or potential surface damage.
Road film and traffic pollution residue identification
Road film represents one of the most persistent forms of windscreen contamination, consisting of a complex mixture of exhaust particulates, tyre residue, and atmospheric pollutants. This contamination typically appears as a greyish, oily film that becomes particularly noticeable when driving into sunlight or oncoming headlight beams. Urban environments with heavy traffic produce significantly higher concentrations of these contaminants, with diesel particulates being especially problematic due to their adhesive properties.
The composition of road film varies seasonally, with winter months introducing additional challenges through salt spray and de-icing chemical residues. These substances create corrosive compounds that not only impair visibility but can also damage windscreen seals and surrounding bodywork if left untreated. Professional detailers recognise road film by its uniform distribution pattern and its resistance to standard glass cleaning solutions.
Automotive fluid splatter from engine bay components
Engine bay fluid contamination presents unique cleaning challenges due to the diverse chemical compositions involved. Power steering fluid, brake fluid, coolant, and various lubricants each require specific removal techniques. Hydraulic fluids are particularly problematic as they contain additives designed to resist removal and maintain their properties under extreme conditions.
Windscreen washer fluid residue, ironically, can also contribute to contamination when low-quality products are used. Cheap washer fluids often contain excessive surfactants that leave streaky residues, whilst products with inadequate anti-freeze protection can crystallise and create stubborn deposits during temperature fluctuations.
Cigarette tar and interior smoking residue buildup
Interior smoking creates a distinctive yellowish-brown film on windscreen surfaces that proves exceptionally challenging to remove using conventional cleaning methods. Cigarette tar contains complex organic compounds that bond chemically with glass surfaces, requiring specialised solvents and mechanical removal techniques.
This contamination type is immediately recognisable by its yellowing effect and its tendency to create rainbow-like interference patterns when viewed at certain angles. The residue becomes increasingly difficult to remove as it ages, with long-term smoking environments requiring professional-grade degreasing agents and multiple cleaning cycles.
Tree sap and organic matter adhesion patterns
Organic contaminants such as tree sap, bird droppings, and insect residues create localised adhesion challenges that can permanently damage windscreen surfaces if addressed incorrectly. Tree sap, in particular, hardens through oxidation and UV exposure, creating crystalline deposits that require careful mechanical removal to avoid scratching.
Different tree species produce saps with varying chemical compositions and hardness characteristics. Coniferous tree saps typically contain higher concentrations of terpenes, making them more soluble in alcohol-based solvents, whilst deciduous tree saps often require enzyme-based cleaners for effective removal.
Essential tools and materials for professional windscreen degreasing
Specialised glass cleaning solutions: invisible glass vs stoner glass cleaner
Selecting the right chemical foundation is critical when you are dealing with a heavily greasy windscreen. Two of the most respected options in professional circles are Invisible Glass and Stoner Glass Cleaner, both formulated to cut through road film, oily residues and nicotine deposits without leaving streaks. While similar in branding, these glass cleaners have subtle differences in surfactant balance and evaporation rate that can influence your process on hot days or in high-humidity environments.
Invisible Glass is typically favoured for its fast-flash formula and minimal residue characteristics, making it ideal when you need a streak-free windscreen cleaning method under workshop lighting or direct sun. Stoner Glass Cleaner (often supplied in an aerosol format) delivers a slightly foamier application, which clings better to vertical glass, giving you more working time on severe grease contamination. In practice, many detailers keep both products on hand: Invisible Glass for final wipes and interior work, and Stoner for the heavy exterior build-up that needs a more aggressive but still glass-safe approach.
Whichever glass cleaning solution you choose, ensure it is clearly labelled as ammonia-free if you are working around tinted films, rain sensors or delicate interior surfaces. Ammonia can cause discolouration of window tints, degrade rubber seals over time, and introduce strong fumes in confined cabins. For DIY users, the safest approach is to test the chosen product on a small corner of the windscreen and check for any unexpected hazing or reaction, particularly if your vehicle has aftermarket tint or previous coatings applied.
Microfibre cloth selection: GSM ratings and weave patterns
The humble cloth you choose has a major impact on how safely and effectively you can remove grease from a windscreen. Professional windscreen cleaning relies on understanding GSM (grams per square metre) and weave types to match the cloth to the task. As a rule of thumb, low-GSM microfibres (200–300 GSM) with tight, flat weaves are ideal for glass because they glide easily and are less likely to trap grit that can scratch the surface.
For exterior windscreen degreasing, many detailers favour a fishscale or waffle-weave glass towel, as its pattern increases surface contact and capillary action, lifting oily residues rather than smearing them. Higher GSM cloths (320–400 GSM) are better reserved for buffing surrounding paintwork or drying door jambs, not for the critical wipe on a greasy windscreen. When you are chasing a streak-free windscreen finish, using a dedicated glass-only towel that never touches paint, trim or wheels is essential to avoid cross-contamination.
It is also important to maintain a rotation of microfibre cloths and retire them from glass duty once they become stained, hardened or lose their softness. Washing at low temperatures with a microfibre-safe detergent, and avoiding fabric softener, helps preserve the electrostatic properties that make these cloths so effective at trapping fine dust and film. Think of your glass towel as a surgical instrument: the cleaner and more specialised it is, the better your results and the safer your glass will remain over time.
Clay bar systems for stubborn contaminant removal
When a greasy windscreen feels rough to the touch even after washing, embedded contamination is usually the culprit. Clay bar systems provide a controlled mechanical method to remove bonded particles such as industrial fallout, paint overspray, hardened tree sap residues and stubborn traffic film. Unlike aggressive polishing, a properly lubricated clay bar glides over the glass, shaving off contaminants that protrude from the surface without significantly altering the glass itself.
For heavily contaminated windscreens, you can choose between traditional clay bars and modern synthetic clay pads or mitts that attach to a hand pad or dual-action polisher. Bars in the “medium” grade range are typically sufficient for automotive glass, offering a balance between cleaning power and safety. Always use a dedicated clay lubricant or a slick car shampoo solution; dragging clay on a dry surface is akin to rubbing sandpaper on your windscreen.
Once you have clayed the windscreen in straight overlapping passes, the glass should feel noticeably smoother, and subsequent degreasing passes with glass cleaner will be more effective. It is important to discard the clay if you drop it on the ground, as the bar will pick up grit that can scratch the glass during further use. Used correctly, clay bar systems are one of the most powerful tools for restoring a windscreen that remains greasy and hazy despite multiple conventional cleaning attempts.
Steam cleaning equipment and pressure washer attachments
For certain types of greasy windscreen contamination, particularly baked-on road film and oily residues around the edges and seals, heat becomes a valuable ally. Steam cleaners can soften and emulsify contaminants that resist cold water and standard degreasers, allowing you to lift them with minimal chemical use. By directing controlled steam at the glass, you warm the surface slightly and help break the bond between grime and glass, which can be particularly useful in winter when residues are more stubborn.
Pressure washer glass attachments, such as fan-jet lances with safe pressure ratings, can also assist during the initial rinse phase to dislodge grit and traffic film before you touch the surface with a cloth. However, you must exercise caution: too much pressure concentrated at the edge of the screen can stress seals or exploit existing chips and cracks. Always follow manufacturer guidance and keep the nozzle moving at a sensible distance from the windscreen.
Steam and pressure tools should be viewed as part of an integrated degreasing strategy, not a replacement for proper hand cleaning. They are excellent for loosening grime in hard-to-reach areas such as the base of the windscreen, behind wiper arms and around trim pieces. Used sensibly, these tools reduce the mechanical effort required in later stages and lower the risk of micro-scratches caused by scrubbing at stubborn contamination.
Safety equipment: nitrile gloves and eye protection standards
Professional windscreen degreasing often involves contact with solvents, surfactants and fine particulate matter, so basic personal protective equipment should never be overlooked. Nitrile gloves are preferred over latex for automotive work because they offer better resistance to oils, brake fluid, and alcohol-based glass cleaners. A well-fitting glove also improves your grip on wet tools and cloths, reducing the chance of accidental slips across the glass surface.
Eye protection is equally important, particularly when using aerosol glass cleaners, steam equipment, or when working under a raised bonnet where drips and splashes are common. Safety glasses rated to EN166 (in Europe) or equivalent standards provide impact and splash protection without impeding your field of view. If you have ever had degreasing fluid blow back into your eyes on a windy day, you will understand why this simple precaution is essential.
Beyond gloves and eye protection, consider adequate ventilation whenever you are performing intensive interior windscreen degreasing. Even high-quality cleaners can release vapours that build up inside a closed cabin. Opening doors or windows, or running the fan on fresh-air mode, helps protect your respiratory health while you focus on achieving a clean, grease-free windscreen.
Pre-cleaning assessment and windscreen inspection protocols
Before you reach for any degreasing product, a structured pre-cleaning assessment helps you avoid turning a routine job into an expensive repair. The first step is a visual inspection under natural and artificial light, looking for chips, cracks, previous repair sites and signs of delamination at the edges of the laminated glass. Any structural damage should be documented and, where necessary, referred to a specialist before you apply pressure, heat or abrasive techniques.
Next, perform a tactile assessment by lightly running clean fingertips or a plastic glove across the windscreen after an initial rinse. Rough patches, “gritty” areas or raised specks indicate bonded contamination that will require clay bar or specialised solvents. Greasy windscreen sections can often be identified by their slick yet hazy feel, particularly when you drag a dry microfibre across the glass; the cloth will snag slightly instead of gliding smoothly.
It is also important to assess the surrounding components that interact with the glass. Inspect wiper blades for nicks, hardened rubber and embedded grit, as dirty or damaged wipers will simply re-deposit grease and road film onto a freshly cleaned windscreen. Check the scuttle panel and washer nozzles for accumulated dirt or leaks from the engine bay. By understanding the current condition of the glass and its environment, you can plan a tailored, safe and efficient windscreen degreasing process rather than relying on guesswork.
Step-by-step degreasing methodology for maximum effectiveness
A systematic approach is the key to consistently achieving a clear, streak-free and safe windscreen, especially when dealing with oil, tar and long-term smoking residue. Instead of random wiping, you should follow a structured workflow that progresses from least to most aggressive techniques. This minimises the risk of scratching the glass, damaging seals, or driving contaminants into micro-chips and edges where they are harder to remove.
The following methodology combines best practices from professional detailing and glass repair sectors. It covers initial rinsing, application of degreasing agents, mechanical decontamination, and final refining of the glass surface. By treating the windscreen as a safety-critical component rather than just another body panel, you ensure your cleaning routine supports both visibility and structural integrity over the life of the vehicle.
Initial rinse technique using distilled water systems
Every effective windscreen degreasing process starts with a thorough rinse to remove loose dirt and grit that can scratch the glass during later stages. Whenever possible, using distilled or deionised water significantly reduces mineral spotting and chalky residues, especially in hard-water regions. A low-pressure pre-rinse from top to bottom helps to float away dust, sand and loose traffic film before you make physical contact with the surface.
If you are working at home without access to a full filtered-water system, you can still mimic the benefits by using a pump sprayer filled with distilled water for the final rinse. This is particularly helpful when you are aiming for a spot-free windscreen cleaning finish on dark vehicles where water marks are more obvious. Avoid directing high-pressure jets at existing chips, edges or sensor housings, as concentrated pressure can exacerbate hidden damage.
After the initial rinse, allow the windscreen to drain briefly, then gently sheet distilled water over the surface with a hose or sprayer. The sheeting action encourages contaminants to slide off with the water film, leaving a cleaner base for your degreasing stage. At this point, you should resist the temptation to start wiping aggressively; the goal is to prepare the surface, not complete the clean in a single pass.
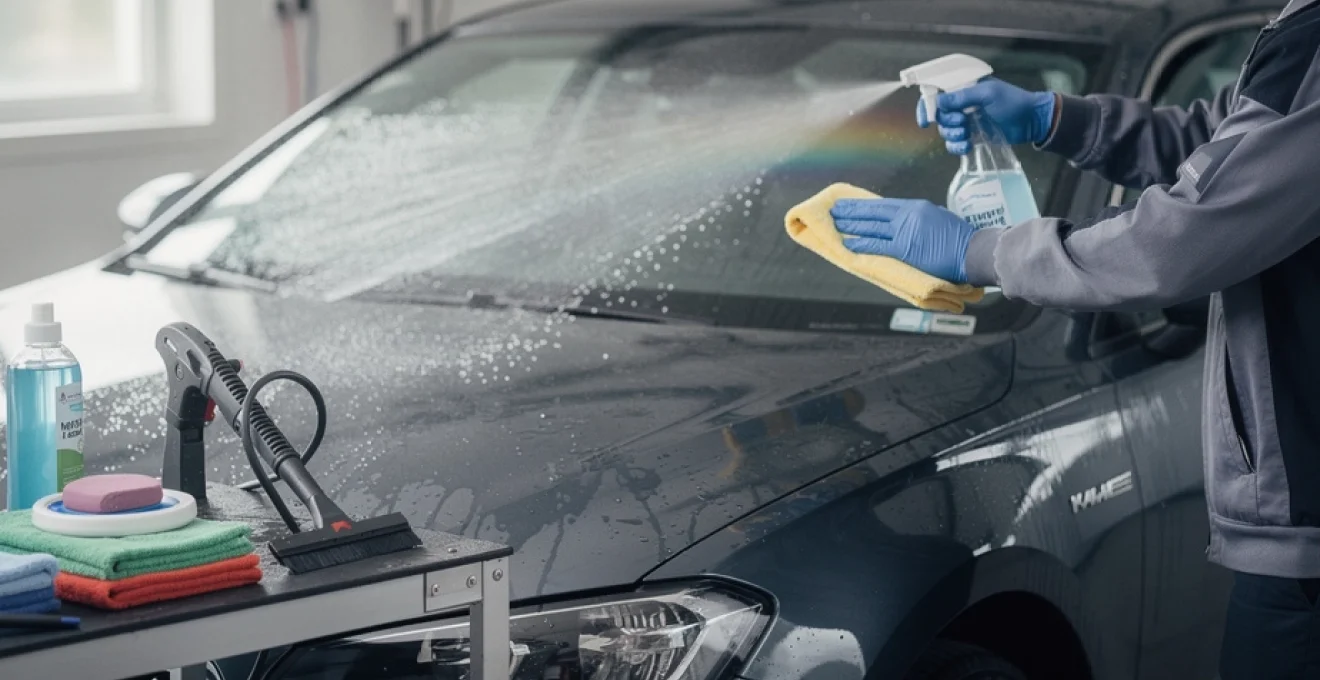
Degreasing agent application methods: spray vs foam distribution
Once the loose debris has been removed, it is time to introduce your chosen glass degreaser. You can apply windscreen cleaning chemicals either as a fine spray or in a foam format, each with its own advantages. Spray application provides quick, even coverage and is ideal for interior glass where you want to control overspray and avoid wetting the dashboard or upholstery. For exterior surfaces with heavy grease, a foaming glass cleaner can cling to vertical glass, giving the active ingredients more dwell time to break down oily films.
Whichever application method you use, the key is controlled distribution rather than saturation. Work in halves or quarters of the windscreen, starting on the passenger side so you are not leaning over freshly cleaned sections while you work. Allow the cleaner to dwell for 20–40 seconds, but do not let it dry on the glass, especially in warm or windy conditions; dried product can cause streaks and may need additional passes to remove.
For interior degreasing of smoking residue or dashboard off-gassing, spray the cleaner directly onto a microfibre cloth rather than onto the glass. This approach reduces airborne vapours and prevents chemical runs that could damage soft-touch plastics. Think of the glass cleaner as a lubricant and carrier: it encapsulates the grease and lifts it into the cloth fibres, so using plenty of clean towel surfaces is just as important as the product itself.
Mechanical removal techniques: clay bar and razor blade usage
After chemical degreasing, any remaining contamination is usually bonded material such as tree sap, overspray or mineral deposits. Mechanical removal is now required, and this is where technique and tool choice become critical to avoid damage. Clay bars or synthetic clay pads should be your first line of attack for bonded contaminants that create a rough, sandpaper-like feel across the windscreen.
Lubricate the glass generously with clay lubricant or a slick shampoo solution, then move the clay in straight lines rather than circles to minimise the appearance of any incidental marring. Work methodically across the windscreen, checking the clay frequently and folding or replacing it as it becomes soiled. You will feel the surface become smoother as the clay lifts contaminants, much like planing down high spots on a piece of wood.
Razor blades or specialised glass scrapers can be used for highly localised, stubborn deposits, such as old stickers, paint specks or thick sap nodules. However, these tools must be used with extreme caution. Only use them on wet, well-lubricated glass, keep the blade at a shallow angle, and always move in a single direction. Avoid the temptation to “chisel” at a spot; instead, take multiple light passes. If you are not fully confident with a blade on glass, it is safer to repeat clay and chemical cycles than risk scratching or gouging your windscreen.
Final polish application with cerium oxide compounds
For drivers who want the highest level of clarity, or for windscreens showing light wiper marks and persistent hazing, a final polishing stage can make a remarkable difference. Cerium oxide-based glass polishes are formulated specifically to refine glass surfaces, removing micro-scratches and mineral etching that conventional cleaners cannot touch. Used correctly, these compounds can restore a smooth, optically clear surface that resists glare and sheds water more uniformly.
Polishing with cerium oxide is best performed with a dual-action (DA) polisher and a dedicated glass pad, although small areas can be treated by hand with a firm foam applicator. Apply a small amount of polish to the pad, work in a controlled section of the windscreen, and keep the pad moving to avoid heat build-up. The process is more akin to lapping than to aggressive cutting; patience and consistent passes yield better results than heavy pressure.
After polishing, thoroughly rinse and clean the windscreen with your preferred glass cleaner to remove any remaining compound residue. At this stage, the glass should feel completely smooth and visually look almost invisible when viewed from certain angles. This refined surface provides an ideal foundation for the protective treatments and long-term maintenance strategies that will keep your windscreen from becoming greasy again too quickly.
Glass surface protection and long-term maintenance strategies
Once you have invested time in fully degreasing and refining your windscreen, the logical next step is to protect that clean surface. Modern glass sealants and hydrophobic coatings create a thin, durable barrier that helps repel water, oils and traffic film, much like wax or ceramic coatings do for paint. When applied correctly, these products can make future greasy windscreen cleaning significantly easier, as contaminants adhere less strongly and are more readily removed.
Hydrophobic coatings, often marketed under brands such as Rain‑X or as part of ceramic coating systems, cause water to bead and roll off the glass at speed, improving wet-weather visibility and reducing reliance on wipers. However, they must be applied to completely clean, dry glass and buffed thoroughly to prevent smearing or hazing in direct sunlight. Reapplication intervals vary from a few weeks to several months depending on product chemistry and driving conditions.
Long-term maintenance also involves ongoing habits rather than just one-off treatments. Regularly rinsing the windscreen, especially after motorway driving or exposure to salt spray, prevents road film and grease from building up into stubborn layers. Replacing wiper blades at least annually, or at the first signs of juddering or smearing, prevents damaged rubber from dragging contamination and fine grit across the glass. By combining protective coatings with mindful maintenance, you significantly reduce the time and effort required to keep your windscreen safely clear.
Troubleshooting common windscreen cleaning complications and damage prevention
Even with a solid technique, windscreen cleaning does not always go to plan. One of the most common frustrations is persistent streaking or hazy patches that appear when driving towards low sun or bright headlights. In many cases, this is due to residue from previous products, such as silicone-rich dashboard dressings or cheap washer fluids, that smear across the glass. A more aggressive degreasing cycle, sometimes using an isopropyl alcohol (IPA) wipe-down followed by a high-quality glass cleaner, is often required to fully strip these films.
If you notice rainbow-like iridescent patterns after cleaning, particularly when the glass is wet, you may be dealing with surfactant build-up or the remains of incompatible coatings. Carefully repeating the cleaning process with fresh microfibres and an ammonia-free, alcohol-based cleaner usually resolves this. However, if the effect persists, it may indicate deeper micro-scratching or damage to the plastic inner layer on laminated glass in extreme cases, in which case consulting a glass specialist is advisable.
Another frequent issue is the rapid return of smearing or fogging on the inside of the windscreen, even after a thorough clean. This is often caused by ongoing off-gassing from plastics, or from unnoticed sources of moisture such as damp carpets or minor leaks. Improving cabin ventilation, using dehumidifier packs and switching to low-silicone interior care products can dramatically reduce the rate at which interior grease films reappear. Ultimately, preventing contamination is always easier than removing it once it has bonded to the glass.
Finally, always keep damage prevention at the forefront of your cleaning strategy. Avoid using household abrasives, scouring pads or glass cleaners with undisclosed “multi-surface” claims on your windscreen, as these can introduce fine scratches that worsen glare. Be wary of extreme temperature changes, such as pouring hot water onto an icy screen, which can stress or crack cold glass. By combining sound technique, appropriate products and a cautious mindset, you can safely maintain a clear, grease-free windscreen that supports both driving comfort and road safety.