The Dyson DC40 ball upright vacuum cleaner remains a popular model in countless homes across the UK, despite being several years into its product lifecycle. When this machine suddenly loses suction power, the frustration is palpable—particularly for owners who’ve invested in what was marketed as a premium cleaning solution. Loss of suction is the most frequently reported fault with the DC40, and whilst the issue can feel like a catastrophic failure, the underlying causes are often surprisingly straightforward. Understanding the common culprits behind reduced airflow can transform what seems like an expensive repair into a manageable DIY fix that restores your vacuum to its original performance.
Suction loss in the DC40 rarely indicates total motor failure. More commonly, the problem stems from preventable maintenance oversights, accumulated debris in hidden pathways, or gradual component wear that affects the machine’s ability to maintain the sealed airflow system Dyson’s cyclonic technology depends upon. For many owners, the temptation to replace the entire unit arises from not knowing where to look first. This guide examines the DC40’s vulnerable points systematically, providing you with the diagnostic knowledge and practical solutions needed to identify why your vacuum has lost its cleaning power.
Diagnosing loss of suction in the dyson DC40 ball upright vacuum
Effective troubleshooting begins with accurate diagnosis. The DC40’s modular design actually makes fault-finding more straightforward than you might expect, provided you approach the task methodically. Rather than immediately dismantling the entire machine, start by isolating which section of the airflow pathway is affected. This targeted approach saves considerable time and prevents unnecessary component removal that can sometimes create additional problems if reassembly isn’t perfect.
Interpreting reduced airflow through the cyclone assembly
When you empty the clear bin and notice the cyclones aren’t generating the characteristic vortex pattern during operation, this indicates either a pre-cyclone blockage or a seal failure somewhere in the assembly. The cyclone shroud should create visible dust separation when functioning correctly. If debris simply accumulates at the bottom without the spinning action, the motor is likely running but air isn’t flowing through the system as designed. Check the bin release mechanism hasn’t created a gap where the bin meets the main body—even a millimetre of misalignment can compromise the entire sealed system.
Testing suction power at the cleaner head and wand connection
One of the most revealing diagnostic tests involves checking suction at different points in the system. Remove the wand and test suction directly at the ball’s hose connection point. If you feel strong airflow here but nothing at the cleaner head, you’ve immediately narrowed the problem to the wand, hose assembly, or the head itself. This is precisely what the forum discussion highlighted—strong hose suction but no power reaching the floor tool. The DC40 uses a pneumatic valve system that redirects airflow between the hose and the cleaner head depending on the machine’s position. When this valve mechanism sticks or fails, you’ll experience exactly this symptom: excellent suction when using attachments, but absolutely nothing when attempting to clean floors in the upright position.
Identifying unusual motor sounds indicating internal blockages
Your ears provide valuable diagnostic information. A healthy DC40 motor produces a consistent, high-pitched whine that remains steady during operation. Changes in motor sound often precede complete suction loss. A fluctuating pitch suggests intermittent blockage, where debris partially restricts airflow before shifting position. A screaming, abnormally high-pitched shriek typically indicates the motor is spinning faster than normal because reduced back-pressure from a blockage allows it to exceed its optimal RPM range. Conversely, a labouring, grinding sound points toward motor bearing wear—a more serious fault that maintenance won’t resolve.
Using the blockage indicator light for preliminary assessment
The DC40 features a red MAX indicator light that illuminates when the machine detects excessive restriction in the airflow path. This thermal sensor responds to increased motor temperature resulting from reduced cooling airflow. However, don’t rely exclusively on this indicator. The light sometimes fails to activate despite significant blockages, particularly if the obstruction allows just enough air through to prevent temperature
rising enough to trigger the cut-out. Treat the light as a warning sign rather than a definitive diagnosis; if it comes on, or if suction feels weak even without a warning, you should immediately move on to a visual inspection of common blockage and leak points rather than continuing to run the machine and risk overheating the motor.
Blocked airflow pathways and debris accumulation points
On a Dyson DC40 that has stopped suction or shows dramatically reduced pickup, physical blockages are still the number one cause. The airflow path snakes from the cleaner head, through the ball assembly, up into the cyclone, and back down past the filters, which creates multiple points where hair, pet fur, and larger debris can lodge. Think of the internal airflow like a motorway: one small crash in the wrong lane can gridlock everything behind it, even if the rest of the route is perfectly clear. By methodically checking each known choke point, you can usually restore proper suction without specialist tools.
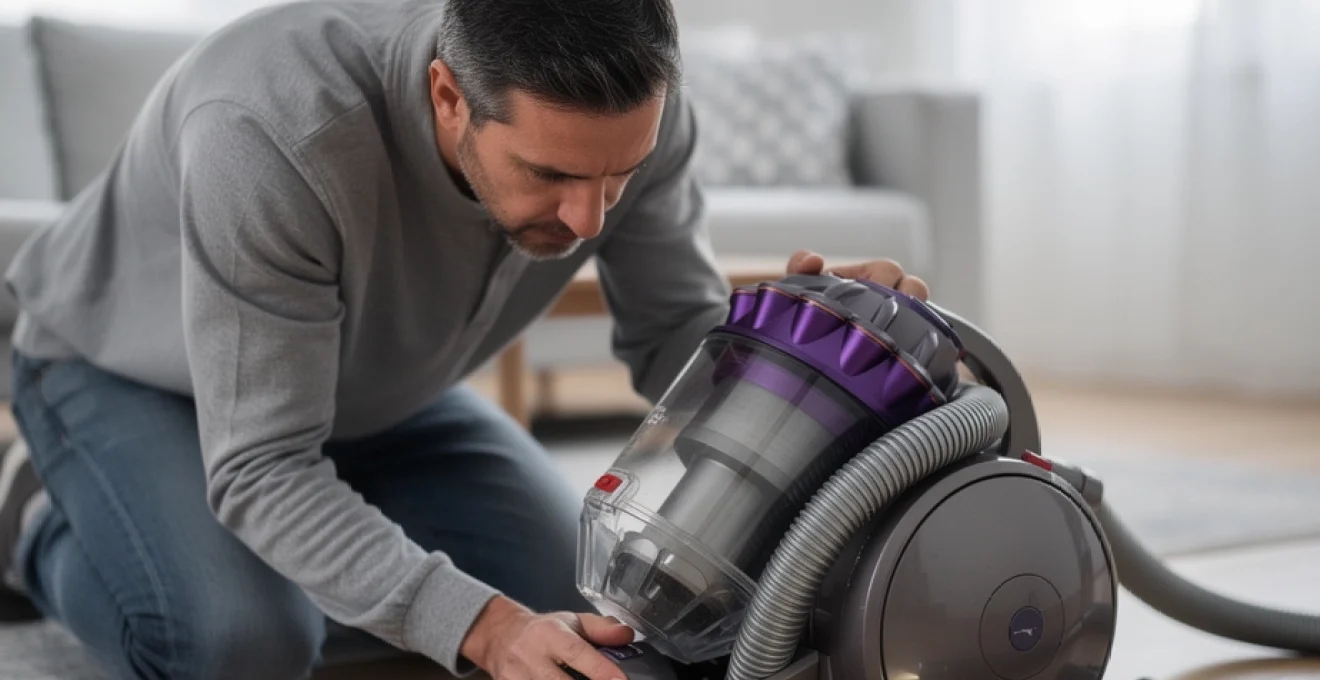
Clearing the transparent bin and cyclone shroud obstructions
Start with the obvious but often overlooked area: the clear bin and the cyclone shroud. When the DC40 bin is allowed to overfill, fine dust compacts around the shroud mesh and in the lower throat of the bin, restricting airflow before it even reaches the cyclones. Release the bin from the main body, open the base flap, and then gently tap the sides over an outside bin to dislodge compacted dust. For stubborn buildup on the shroud, use a soft brush or an old toothbrush to loosen debris, avoiding anything sharp that might deform the mesh.
Many users assume that emptying to the “MAX” line is acceptable, but consistently running above half full can accelerate blockage of the shroud and cyclone inlets. If you can see dust caked against the internal metal mesh or notice that tapping the bin produces a fine cloud rather than distinct clumps, airflow through the cyclone assembly is already compromised. In such cases, you may need to separate the bin from the cyclone top section and use a low-powered vacuum or compressed air (outside only) to clear the fine dust that washing cannot reach. Never immerse the entire cyclone assembly in water unless the manufacturer’s guidance explicitly allows it, as trapped moisture can create a semi-permanent sludge that narrows the air passages.
Removing compacted debris from the ball assembly air channels
Next, focus on the ball assembly, which houses crucial air channels on the DC40. Because the machine steers and pivots on this ball, dust-laden air is forced through curved ducts that are prone to catching larger fragments like plastic packaging, pine needles, and cable ties. If the DC40 has excellent suction at the wand but very weak or no suction at the cleaner head, a partial blockage inside these ball channels is a prime suspect. Lay the machine on its side, remove the clear bin, and access the internal flap valve and ducts where the air transitions from the cleaner head up into the ball.
As highlighted in real-world forum discussions, it’s entirely possible to have a one-inch piece of plastic wedged in a bend that you cannot see but can feel with a fingertip. With the machine unplugged, open any service flaps and gently run a finger or a flexible pipe cleaner along the ducting to detect obstructions. You may need to remove the cleaner head using the red clip and disconnect the small rear hose on the ball to gain full access. If you dislodge a blockage but suction is still poor, repeat the process from both directions to ensure no compacted hair or grit remains trapped behind the original obstruction.
Inspecting and clearing the hose connection points and telescopic wand
If you have strong suction at the base but weak or intermittent suction at the handle, the telescopic wand or main hose is likely restricted. The DC40 wand is a narrow, curved tube that can easily trap socks, tissues, and pet toys, especially if someone has tried to vacuum them up in a hurry. Detach the wand fully, look through it against a bright light source, and confirm that you can see daylight from end to end. If you cannot, gently feed a blunt rod, broom handle, or length of flexible plastic through until the blockage is pushed free.
The flexible hose can collapse internally or twist in a way that pinches the airflow, mimicking the symptoms of a more serious fault. Stretch the hose out completely and check for any kinks, flattened sections, or audible whistling when the vacuum runs, which can indicate a split. Pay special attention to the connection cuffs at each end: hair and fluff often wrap around these joints, slowly building a felt-like plug that restricts suction. Clearing these connection points and ensuring the hose is fully and firmly pushed back into the handle when not in use helps the directional valve send airflow to the cleaner head instead of leaking out around loose fittings.
Addressing clogs in the post-motor HEPA filter housing
Although blockages before the motor are more common, the post-motor HEPA filter housing on the DC40 can also become a bottleneck when maintenance is neglected. When the filter saturates with fine dust, it increases back pressure on the exhaust side of the motor, which in turn reduces overall suction and can trigger overheating. Remove the HEPA filter cover from the side of the ball and inspect not just the filter itself but also the surrounding plastic grille and exhaust channels for lint and hair buildup.
If you find dense grey “felt” around the exhaust outlets, carefully vacuum it away using another machine or a handheld vacuum. Never run the DC40 without its HEPA filter in place in an attempt to “test suction”, as you risk drawing unfiltered particles through the motor housing and into the room. Instead, clean or replace the HEPA filter and re-test suction with the housing properly sealed. A clean exhaust path allows the motor to expel air freely, maintaining the pressure differential that creates strong suction at the cleaner head.
Washable filter maintenance for the DC40 lifetime filter system
The Dyson DC40 is marketed with “lifetime” washable filters, but lifetime does not mean maintenance-free. In practice, the pre-motor foam filter and the post-motor HEPA filter need regular washing and eventual replacement if you want to prevent the vacuum from losing suction. Think of these filters as the lungs of your DC40: if they are clogged, the machine has to work harder to breathe, resulting in weak performance and a hotter, noisier motor. Proper filter care is one of the simplest and most cost-effective ways to restore suction on a Dyson that seems tired.
Cleaning the pre-motor foam filter located behind the ball
The pre-motor foam filter is positioned to catch the bulk of fine dust before it reaches the motor, and on a DC40 that has stopped suction, it is often found completely choked. Access it by removing the clear bin and locating the circular filter housing (usually blue or purple) on the top or side of the ball, depending on your exact variant. Release the latch, lift out the foam element, and inspect it under a bright light. If no light passes through or the foam looks dark grey rather than blue, it is overdue a wash.
Rinse the foam filter under cold running water, gently squeezing from the centre outwards until the water runs clear. Avoid using detergents or hot water, as these can damage the foam structure and reduce filtration efficiency. Once rinsed, shake off excess water and leave the filter to dry naturally in a warm, well-ventilated area for at least 24 hours. Installing a damp filter can cause mould growth, unpleasant odours, and further suction loss as moisture attracts more dust. Only when the foam feels completely dry to the touch should you refit it and reassemble the machine.
Washing the post-motor HEPA filter and proper drying techniques
The post-motor HEPA filter captures the finest particles before the air is expelled back into your room, and when it clogs, the Dyson DC40 can lose suction even if everything before the motor is spotless. Remove the HEPA filter from its housing in the ball and check for visible discolouration or caked dust on the pleats. If your model’s manual confirms it is washable, rinse it under a gentle stream of cold water, holding it so the water flows through the pleats from clean side to dirty side to flush out trapped particles.
Drying a HEPA filter properly is critical. Because of its dense construction, it can retain moisture deep inside the pleats long after the surface feels dry. Stand the filter upright in a warm, airy room and allow a minimum of 24–48 hours of drying time. Do not place it directly on radiators, in ovens, or use hairdryers, as rapid heating can warp the plastic frame and compromise the seal. A partially wet HEPA filter behaves like a blocked one, so if in doubt, give it another day before reinstalling. Once fully dry, check that it seats evenly in the housing with no gaps that could bypass filtration and reduce effective suction.
Recognising filter saturation and replacement thresholds
Even “lifetime” filters reach a point where washing no longer restores adequate airflow. Foam can lose its resilience, and HEPA media can become permanently stained and compressed, much like a sponge that never quite rebounds to its original shape. If your Dyson DC40 still has poor suction after thorough washing and drying of both filters, or if the filters remain dark, smell musty, or shed material when handled, replacement is the logical next step. For heavily used machines, particularly in homes with pets or renovation dust, replacing filters every 12–24 months is a realistic maintenance interval.
From a cost perspective, a new genuine or high-quality compatible filter set is far cheaper than a motor replacement or a new vacuum. Watch for recurring symptoms such as the thermal cut-out tripping, the motor sound changing when you remove the filter, or the blockage indicator light coming on shortly after cleaning. These are all signs that the filters are creating too much resistance. By treating filter replacement as part of regular care rather than a last resort, you extend the life of the motor and keep suction performance closer to factory levels.
Cleaner head brush bar and soleplate issues affecting airflow
The cleaner head is where suction translates into visible cleaning performance, and problems here can make a Dyson DC40 seem “dead” even when the motor and cyclone system are working properly. Hair-wrapped brush bars, worn bristles, and damaged soleplate seals all affect how efficiently the vacuum can pick up dirt from carpets and hard floors. You can think of the cleaner head as the tyre of a car: even with a powerful engine, worn or poorly inflated tyres will make the vehicle feel sluggish and unresponsive on the road. Addressing mechanical issues at the head often produces an immediate, noticeable improvement.
Removing hair and fibre entanglement from the DC40 brush bar
Long hair, thread, and pet fur inevitably wrap around the rotating brush bar, gradually forming a dense layer that prevents the bristles from contacting the carpet. This doesn’t just reduce agitation; it also acts like a belt around the roller, increasing resistance and in some cases triggering the brush bar motor’s protection cut-out. To clean it, first switch off and unplug the vacuum. Flip the cleaner head over, remove the soleplate or access panel (usually held by clips or a coin-operated fastener), and lift out the brush bar if the design allows.
Use scissors or a seam ripper to carefully cut along the length of the roller, sliding the tool under the hair without scoring the plastic. Pull away the cut strands and check the end caps where hair often compresses into tight rings that can seize the bearings. Once the brush bar spins freely and the bristles are visible and springy again, reassemble the head. In many cases, users report their DC40 “coming back to life” after what seems like a purely mechanical clean-up of the roller and end caps.
Inspecting the pneumatic cleaner head for seal degradation
The DC40 uses a form of automatic height and seal control in the cleaner head, relying on airflow and gaskets rather than manual dials on many models. Over time, the rubber or foam seals around the base of the head and the internal air channels can flatten, crack, or tear. When this happens, rather than creating a tight seal against the floor that concentrates suction, the head leaks air around the edges. You might feel strong suction at the hose but notice that the head glides over debris without picking much up, especially on hard floors.
Visually inspect the underside of the cleaner head and the perimeter where it meets the floor. Look for missing strips of rubber, visible gaps, or worn patches that feel hard and shiny instead of soft and compliant. If you gently press the head against the floor with the machine running and notice a temporary improvement in pickup, poor sealing is likely. Replacing the cleaner head seals or, when necessary, the entire head assembly is sometimes the only way to restore optimal airflow at the floor, particularly on older DC40s that have seen heavy use.
Adjusting the soleplate height settings on different floor types
Although the DC40 does not always feature a traditional height adjustment knob, the design still relies on a balance between brush bar pressure, soleplate height, and airflow to perform well on both carpets and hard floors. If the head sits too high on low-pile carpets or hard floors, much of the suction is lost around the sides, while if it sits too low on deep carpets, the machine can feel difficult to push and airflow can choke off entirely. Pay attention to how the vacuum behaves as you move between surfaces: does it suddenly become hard to push, or does the motor pitch change dramatically?
Some variants of the DC40 have subtle height or mode selectors on the head, often marked for “carpet” and “hard floor”. Ensure you are using the correct setting for the surface you are cleaning. On models without explicit controls, you can influence the effective height by the angle at which you hold the handle and by keeping the cleaner head free of thick dust layers or warped soleplates that alter its geometry. The goal is even contact with the floor across the width of the head, with enough clearance for air to flow under the soleplate and carry debris up into the nozzle.
Replacing worn brush bar bristles and end caps
Even if you keep the brush bar free of hair, the bristles themselves wear down over years of use, especially on abrasive carpets. Short, rounded bristles fail to lift fibres or disturb embedded dust, which can make it seem as though suction has disappeared when in reality the airflow is simply not being directed effectively into the pile. If you compare your brush bar to a new one and notice that the bristles are significantly shorter or uneven, replacement is worth considering. Many DC40 cleaner heads allow the brush bar to be swapped as a single component.
End caps and bearings also play a critical part in maintaining smooth rotation. When these wear or crack, the brush bar can drag or wobble, reducing its ability to channel debris towards the suction inlet. Listen for squeaks or grinding noises from the head and check for play when you rotate the bar by hand. Replacing a tired brush bar assembly is usually a straightforward job involving just a few clips or screws, and it can dramatically improve both cleaning performance and perceived suction on carpets.
Cyclone assembly seal failures and component deterioration
The cyclone assembly is the heart of the Dyson DC40’s bagless design, creating the high-speed airflow that separates dust from air. For this system to work properly, it relies on tight seals and intact polycarbonate cones. When seals degrade or plastic components crack, the vacuum can lose suction even though the motor is still generating the same airflow. It’s a bit like trying to drink through a cracked straw: the effort is there, but the pressure never fully reaches the point where it’s needed. Inspecting the cyclone and bin for subtle leaks is therefore an important step when other checks haven’t solved the problem.
Examining rubber gaskets at the bin-to-cyclone interface
Every time you remove and refit the clear bin, the rubber gasket where it meets the cyclone assembly is compressed and released. Over years, this gasket can flatten, deform, or pick up nicks that prevent a full seal. Even a small gap at this junction allows air to bypass the cyclones, which not only reduces dust separation but also lowers suction at the cleaner head. Remove the bin and visually check the circular gasket or ring seal: it should be evenly rounded, flexible, and free from splits or embedded grit.
Clean the sealing surfaces with a slightly damp cloth to remove fine dust that might prevent a tight fit. Avoid using oily products or silicone sprays, as these can swell certain rubber compounds and actually cause further distortion. When you refit the bin, ensure it clicks firmly into place with no rocking or looseness. If you can feel air leaking around the bin area when the vacuum is running, or if the bin feels unusually easy to detach, the gasket may need replacement. Fortunately, these seals are often available as separate parts and can be swapped at home with basic tools.
Detecting cracks in the polycarbonate cyclone cones
Although Dyson’s polycarbonate cyclone cones are tough, they are not indestructible. Drops, heavy impacts, or repeated stress at the same point can cause fine cracks that are difficult to see but large enough to leak air. Such leaks disrupt the controlled spiral flow within the cone, decreasing separation efficiency and slightly reducing the negative pressure available at the cleaner head. Over time, dust may also work its way into these cracks, exaggerating the problem and sometimes causing rattles or vibration.
To inspect for damage, remove the bin, hold the cyclone assembly under bright light, and look slowly around each cone and joint. Hairline fractures often appear as whitish lines or star-shaped patterns near mounting points. If you run the machine and gently press on suspect areas (taking care to avoid moving parts), you might hear a faint change in whistle or feel air escaping. Unfortunately, cracked cyclone components generally cannot be reliably repaired with glue, as any internal protrusion disturbs airflow. In such cases, replacing the entire cyclone top or using a refurbished assembly from a reputable source is the most practical solution.
Addressing bin release mechanism misalignment
The bin release mechanism on the DC40 must align precisely for the base flap and upper seal to close correctly. If the release button or hinge becomes slightly bent or worn, the bin may hang a fraction lower or tilt, leaving an invisible gap that compromises suction. Symptoms often include intermittent performance: you might have good suction after reassembling the bin, only for it to drop off again after a few uses as the bin shifts out of its optimal position.
Check the hinge points, latches, and the red release trigger for signs of slackness or damage. With the machine switched off, gently wiggle the bin to see how much play there is; excessive movement suggests wear. Make sure the base flap snaps shut crisply and sits flush all the way round; any warping or debris caught in the hinge area can stop it sealing fully. Sometimes, simply cleaning the mechanism and carefully re-seating the bin resolves the issue, but if the release catch is cracked or the hinge is distorted, replacing the bin assembly is the safest way to regain consistent suction and dust containment.
Motor and electrical faults causing suction loss in the DC40
Once blockages, filters, the cleaner head, and cyclone seals have all been checked, persistent suction problems on a Dyson DC40 may point towards motor or electrical issues. While true motor failure is less common than simple clogs or dirty filters, it becomes more likely as these machines age. A worn motor may still run, but at reduced speed or with poor torque, resulting in noticeably weaker suction. Electrical control components, such as the PCB in the ball and the brush bar drive electronics, can also misbehave, creating intermittent or degraded performance that can be mistaken for airflow problems.
Testing the dyson digital motor for reduced RPM output
In a workshop setting, technicians use tachometers or test rigs to measure the actual RPM of a vacuum motor, but at home you can still form a reasonable impression of motor health without specialist equipment. Compare the sound and power of your DC40 to a known-good machine if possible, or recall how it sounded when new. A healthy motor produces a strong, steady high-pitched tone that rises quickly to operating speed. If yours spins up sluggishly, sounds noticeably quieter despite clean filters, or fails to pull the hose skin tight under your hand, reduced RPM is a possibility.
You can perform a simple functional test by running the DC40 with all filters cleaned and the hose and wand removed, then feeling the suction directly at the main inlet on the ball. If suction here is weak even with minimal restrictions, the motor is not generating sufficient airflow. Bear in mind that replacing the main motor on a DC40 is often uneconomical for domestic users: genuine motors can be expensive, and labour costs add up quickly due to the complexity of the ball assembly. At this stage, you may want to weigh the cost of repair against purchasing a refurbished DC40 or a newer vacuum, especially if other components also show heavy wear.
Diagnosing thermal cut-out activation and overheating issues
The DC40 includes a thermal cut-out designed to protect the motor from overheating—a common side effect of blocked filters or airflow paths. If your vacuum runs for a few minutes, then shuts down and only restarts after it has cooled, this is a classic sign that the thermal protection is intervening. While this behaviour can be caused by simple blockages, it can also persist even after a thorough clean if the motor is running hotter than it should due to age-related inefficiency or internal dust build-up.
To differentiate between airflow-related overheating and emerging motor failure, run the machine with all filters freshly cleaned and the hose and wand removed, allowing maximum airflow through the system. If it still cuts out after a short period, or if the body of the ball feels excessively hot to the touch, the motor may be nearing the end of its service life. Continuing to use a machine that frequently trips its thermal cut-out is not recommended, as repeated overheating can damage insulation and windings, leading to sudden failure. At this point, professional assessment is advisable before deciding whether to invest further in the DC40.
Inspecting carbon brush wear and PCB controller malfunctions
On brushed motors, worn carbon brushes can cause reduced power, arcing, and erratic operation, all of which translate into weaker suction and strange noises. While many later Dyson designs use different motor technologies, plenty of DC40 units still rely on carbon brushes that wear down over thousands of hours of use. Accessing and inspecting these brushes is a job for confident DIYers or professional repairers, as it usually requires a deep strip-down of the ball assembly and motor housing. Signs of brush-related issues include intermittent power, sparking visible through motor vents, or a noticeable burning smell.
The PCB (printed circuit board) controllers inside the DC40 manage power delivery to the main motor and, in some versions, to the brush bar motor as well. Faulty PCBs can cause the motor to run at reduced voltage or cut out under load, mimicking airflow restrictions. If you have ruled out all physical causes of suction loss and the machine still behaves unpredictably—starting and stopping, changing pitch without reason, or refusing to power the brush bar—it’s possible the control electronics are at fault. While replacement PCBs are sometimes available, diagnostics at this level are best handled by an experienced technician with access to spare parts and test equipment.
Ultimately, when motor or PCB issues are confirmed on an older Dyson DC40, you face a cost–benefit decision. Many owners choose to repair blockages, replace filters, and refurbish cleaner heads themselves, but draw the line at major electrical work. If your DC40 has otherwise been reliable and you value its performance, a professional repair may still make sense. If not, the knowledge you’ve gained by working through these diagnostics will help you maintain your next vacuum more effectively and hopefully avoid premature suction loss in the future.